
If you are a software developer like me, you are probably excited about graphs and stats from systems that are relevant for your workflow. If this data is available on a live updated big screen on the wall, it´s even better. Atlasboard is one of the tools that can easily get you a nice looking status board.
Atlasboard is an open source nodejs based application created by http://www.atlassian.com.
Since I´m a .net developer and have most of my apps on Azure, I wanted to host Atlasboard in an Azure Web App. Here is a walk through of how I got it up and running.
Start by creating a new web app through the Azure Portal. You could also do this from the command line using the Azure CLI, but I´m going to use the Azure Portal in this walk through.

Make sure you have Node installed.
Run npm install -g atlasboard. This will install atlasboard as a global package on your local machine.
Then use the new atlasboard command you just installed to create a new dashboard by issuing the command
atlasboard new mydashboard
This will create a new directory structure with your new dashboard.
-rw-r--r--  1 henning  staff  139 May 12 22:37 README.md
drwxr-xr-x  4 henning  staff  136 May 12 22:37 assets
drwxr-xr-x  6 henning  staff  204 May 12 22:37 config
-rw-r--r--  1 henning  staff  192 May 12 22:37 globalAuth.json.sample
-rw-r--r--  1 henning  staff  502 May 12 22:37 package.json
drwxr-xr-x  4 henning  staff  136 May 12 22:37 packages
-rw-r--r--  1 henning  staff  580 May 12 22:37 start.js
drwxr-xr-x  3 henning  staff  102 May 12 22:37 themes
Then we need to add the atlasboard dependency in package.json like this:
  "dependencies": {
    "atlasboard": "^1.1.3"
  }
cd into mydashboard and run npm install to install the required packages.
You should now be able to run atlasboard start 3333 to start atlasboard. Open http://localhost:3333 in a browser to make sure it works.
Before you can deploy to Azure, there are a couple of adjustments you need to do.
1: Change the port number variable from ATLASTBOARD_PORT to PORT as shown below.
Before:
atlasboard({port: process.env.ATLASBOARD_PORT || 3000, install: true}, function (err) { After:
atlasboard({port: process.env.PORT || 3000, install: true}, function (err) {2: Change the required npm version in package.json
Before:
  "engines": {
    "npm": "~2.0.0",
    "node": ">=0.10"
  },
After:
  "engines": {
    "npm": ">2.0.0",
    "node": ">=0.10"
  },
We are now ready to deploy. I´ll choose to deploy directly from a local git repository but you could deploy from github, vsts etc. To enable git deployments to your Azure web app, go to the Azure portal again, click “Deployment source” and choose “Local Git repository” as the deployment source as shown in the screenshot below.
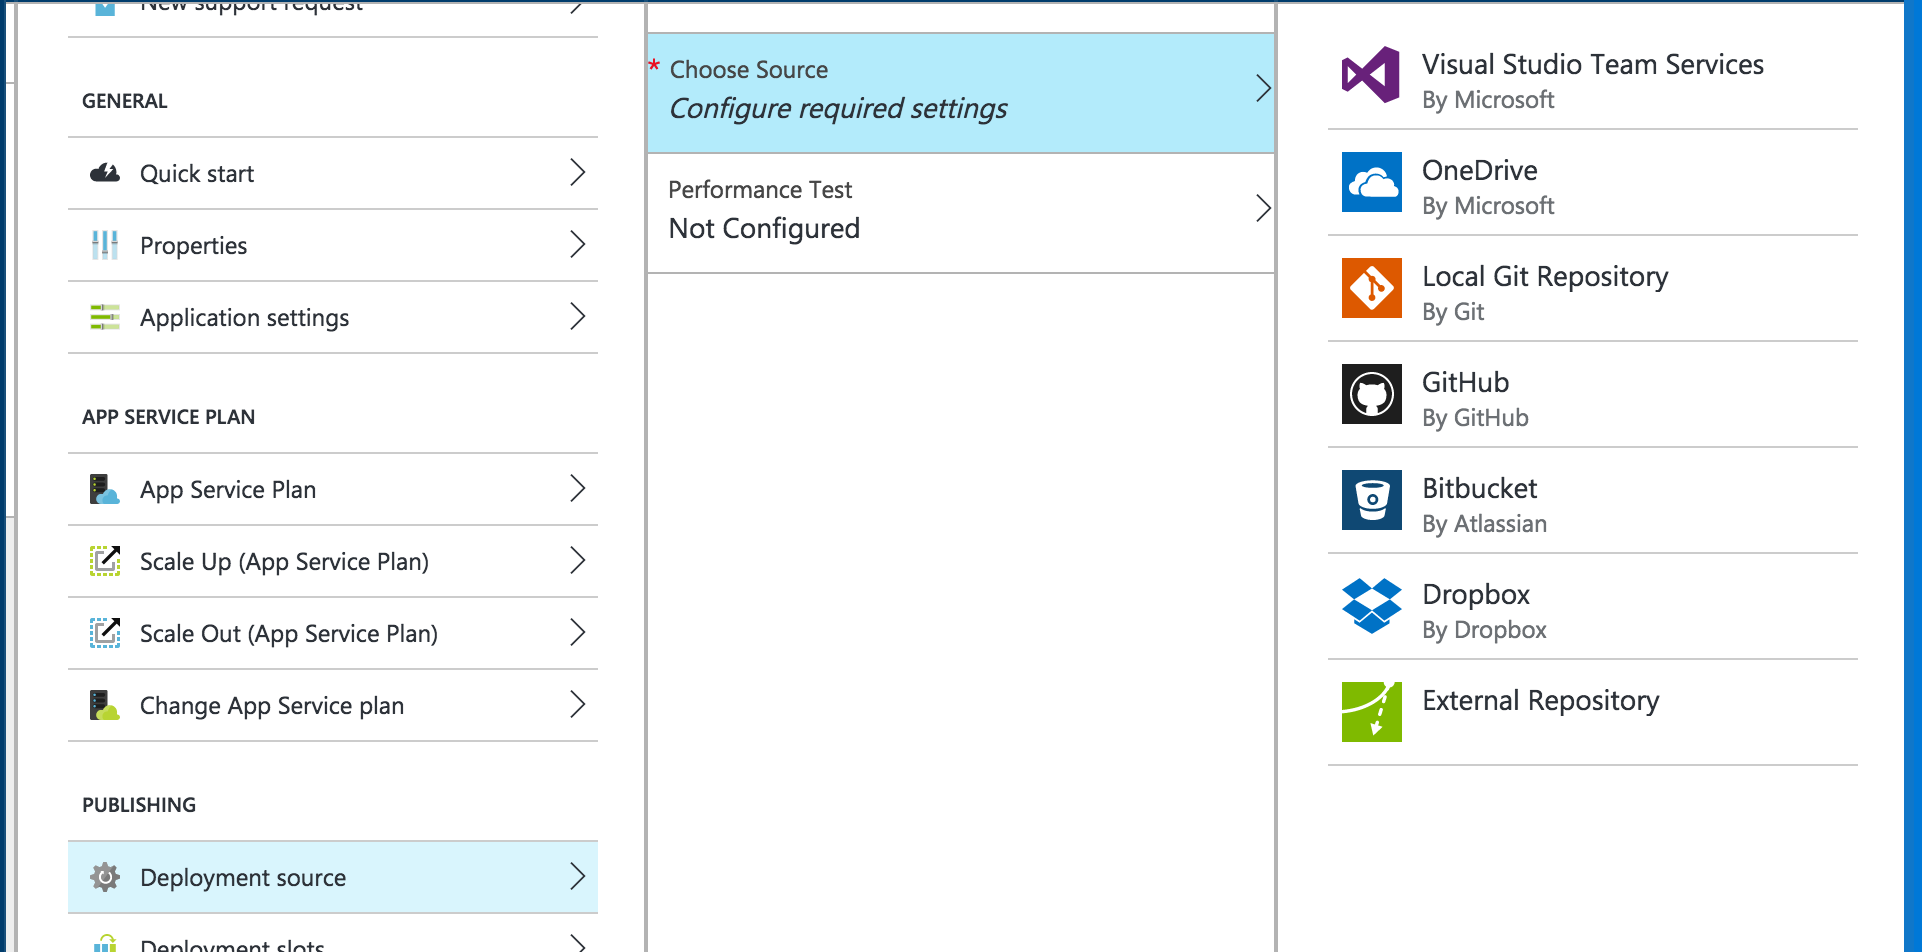
Then open “Deployment credentials” and set a username and password. This will be the credentials you use when adding Azure as a remote to your local git repository.
The next thing you need to do is to initialize the mydashboard directory as a git repository by
doing a git init. Make sure you do this inside the root directory of the dashboard you have created.
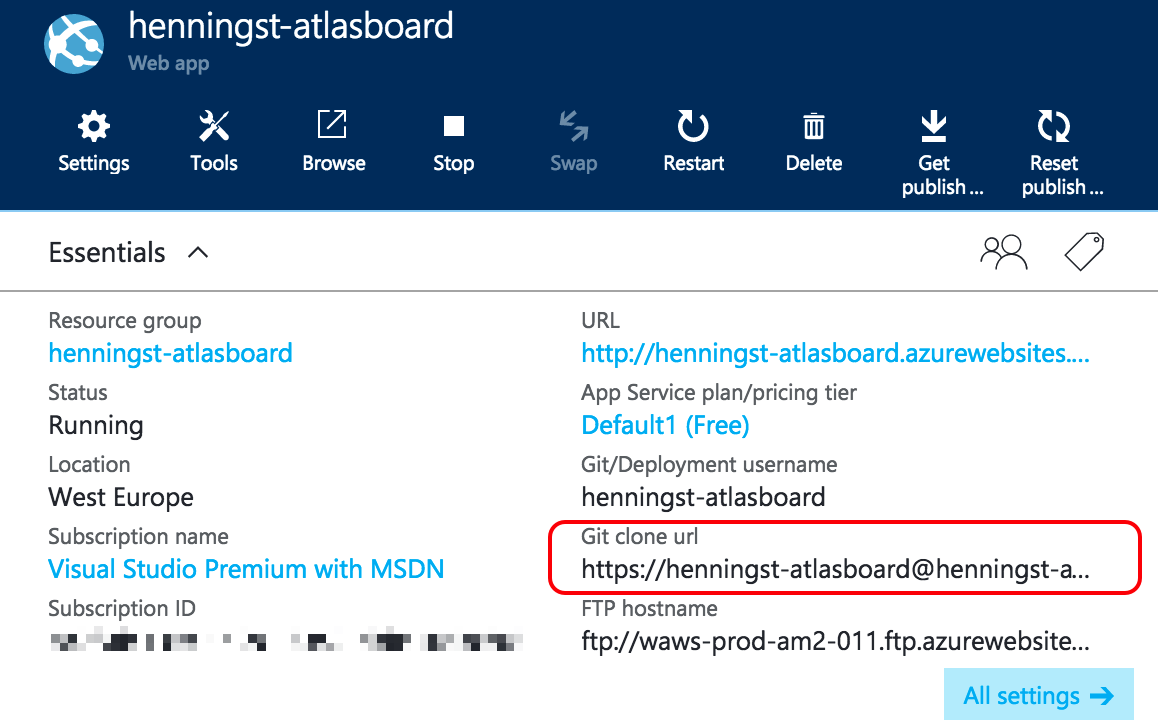
Now add the git url of your web app as a remote in order to push to Azure.
git remote add azure https://[username]@[your-webapp-name].scm.azurewebsites.net:443/[your-webapp-name].git
You find the Git URL for your web app in the Azure portal as shown in the screenshot below.
Add and commit all files and push to Azure.
git add .;git commit -m "Initial commit";git push azure master
You should now see all the files being pushed and you will also see some output from Kudu that takes care
of installing your node app. If everything goes as expected, you should see remote: Deployment successful.
as one of the last lines of the output.
Tweak package-dependency-manager.js
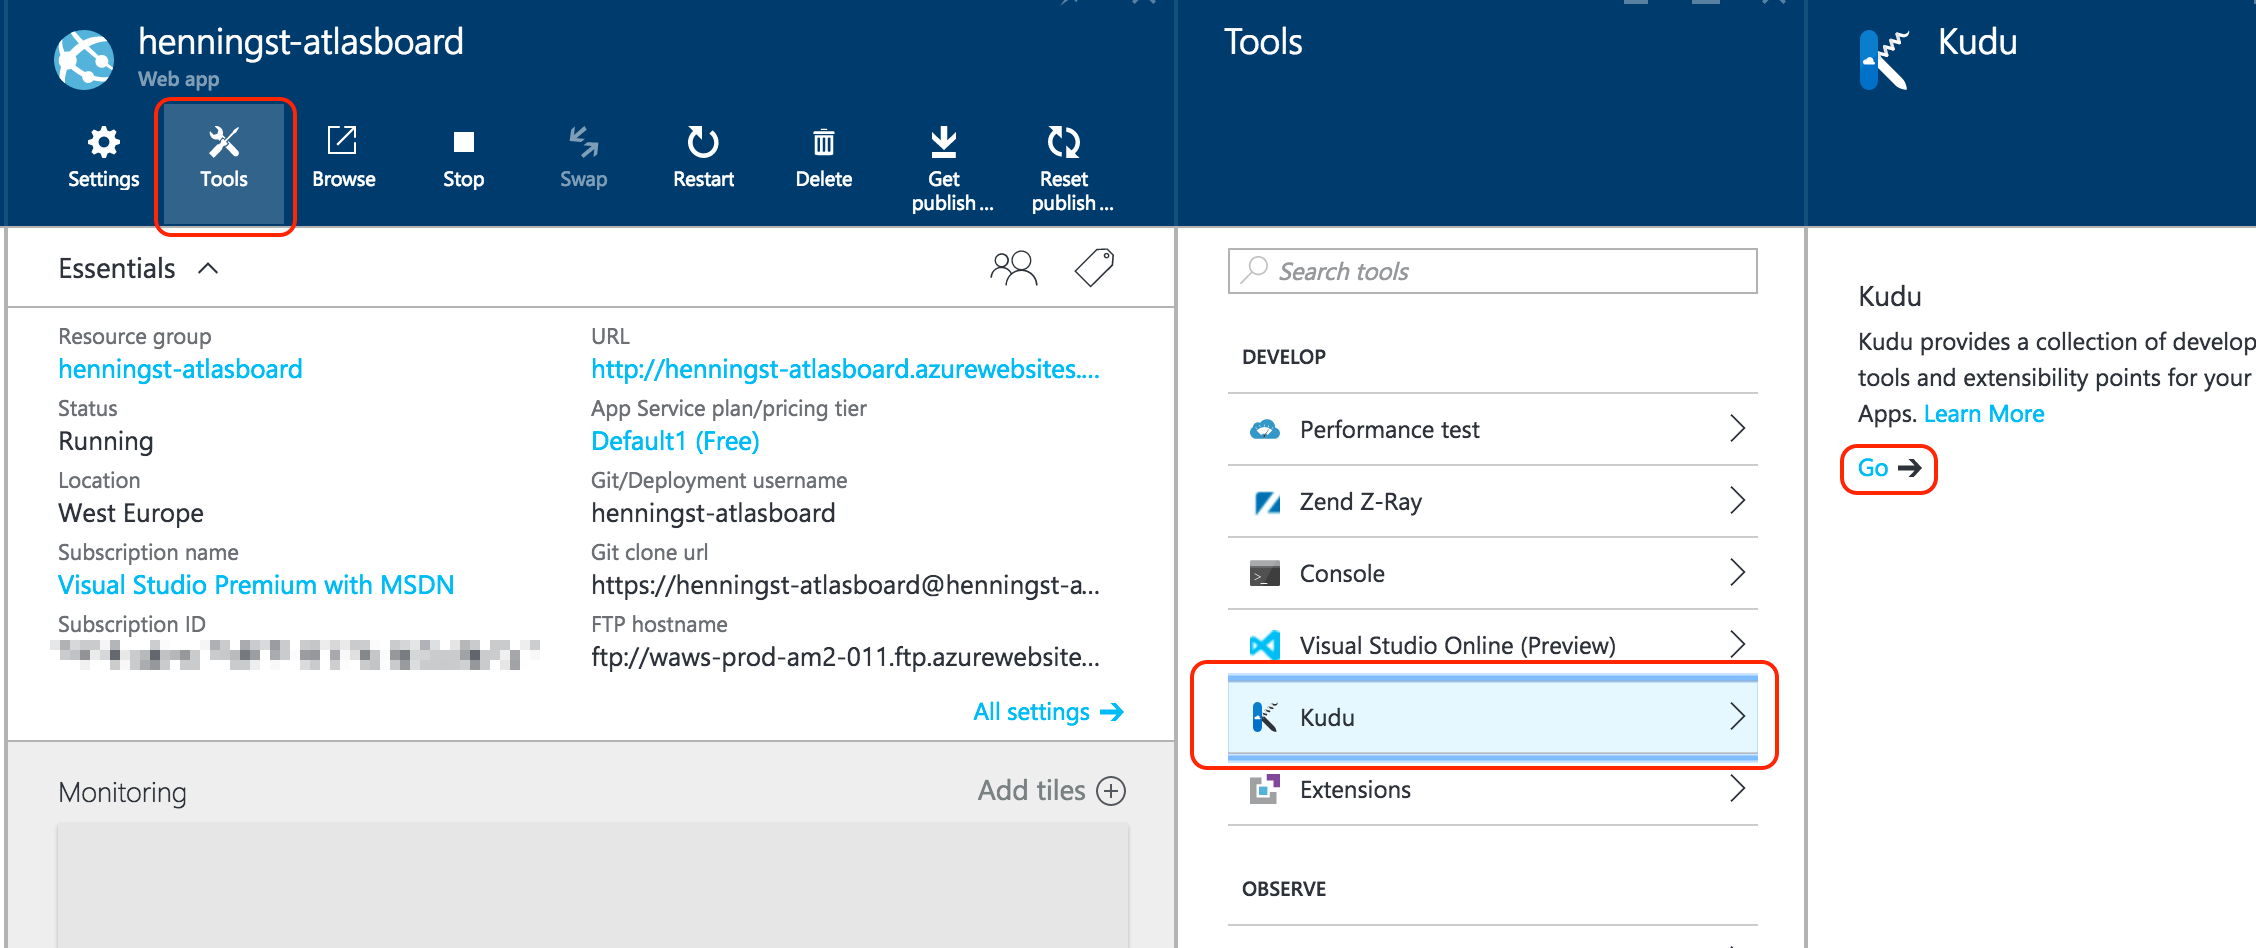
Your dashboard is now installed in Azure, but there is a small hack you need to do in order to get this working. In the Atlasboard dependency manager, you need to change the path to the npm command and modify the command that is issued when installing packages.
This can be done through the Kudu Console which you can find using the following URL https://[your-webapp-name].scm.azurewebsites.net/DebugConsole. There is also a link to the Kudu dashboard from the Azure Portal (Tools –> Kudu –> Go) as shown in the screenshot below.
Locate the following file and edit it.
D:\home\site\wwwroot\node_modules\atlasboard\lib\package-dependency-manager.js
Around line 92:
Before:
  var npmCommand = isWindows ? "npm.cmd" : "npm";

  executeCommand(npmCommand, ["install", "--production", pathPackageJson], function(err, code){
After:
var npmCommand = isWindows ? "D:\\Program Files (x86)\\npm\\3.5.1\\npm.cmd" : "npm";
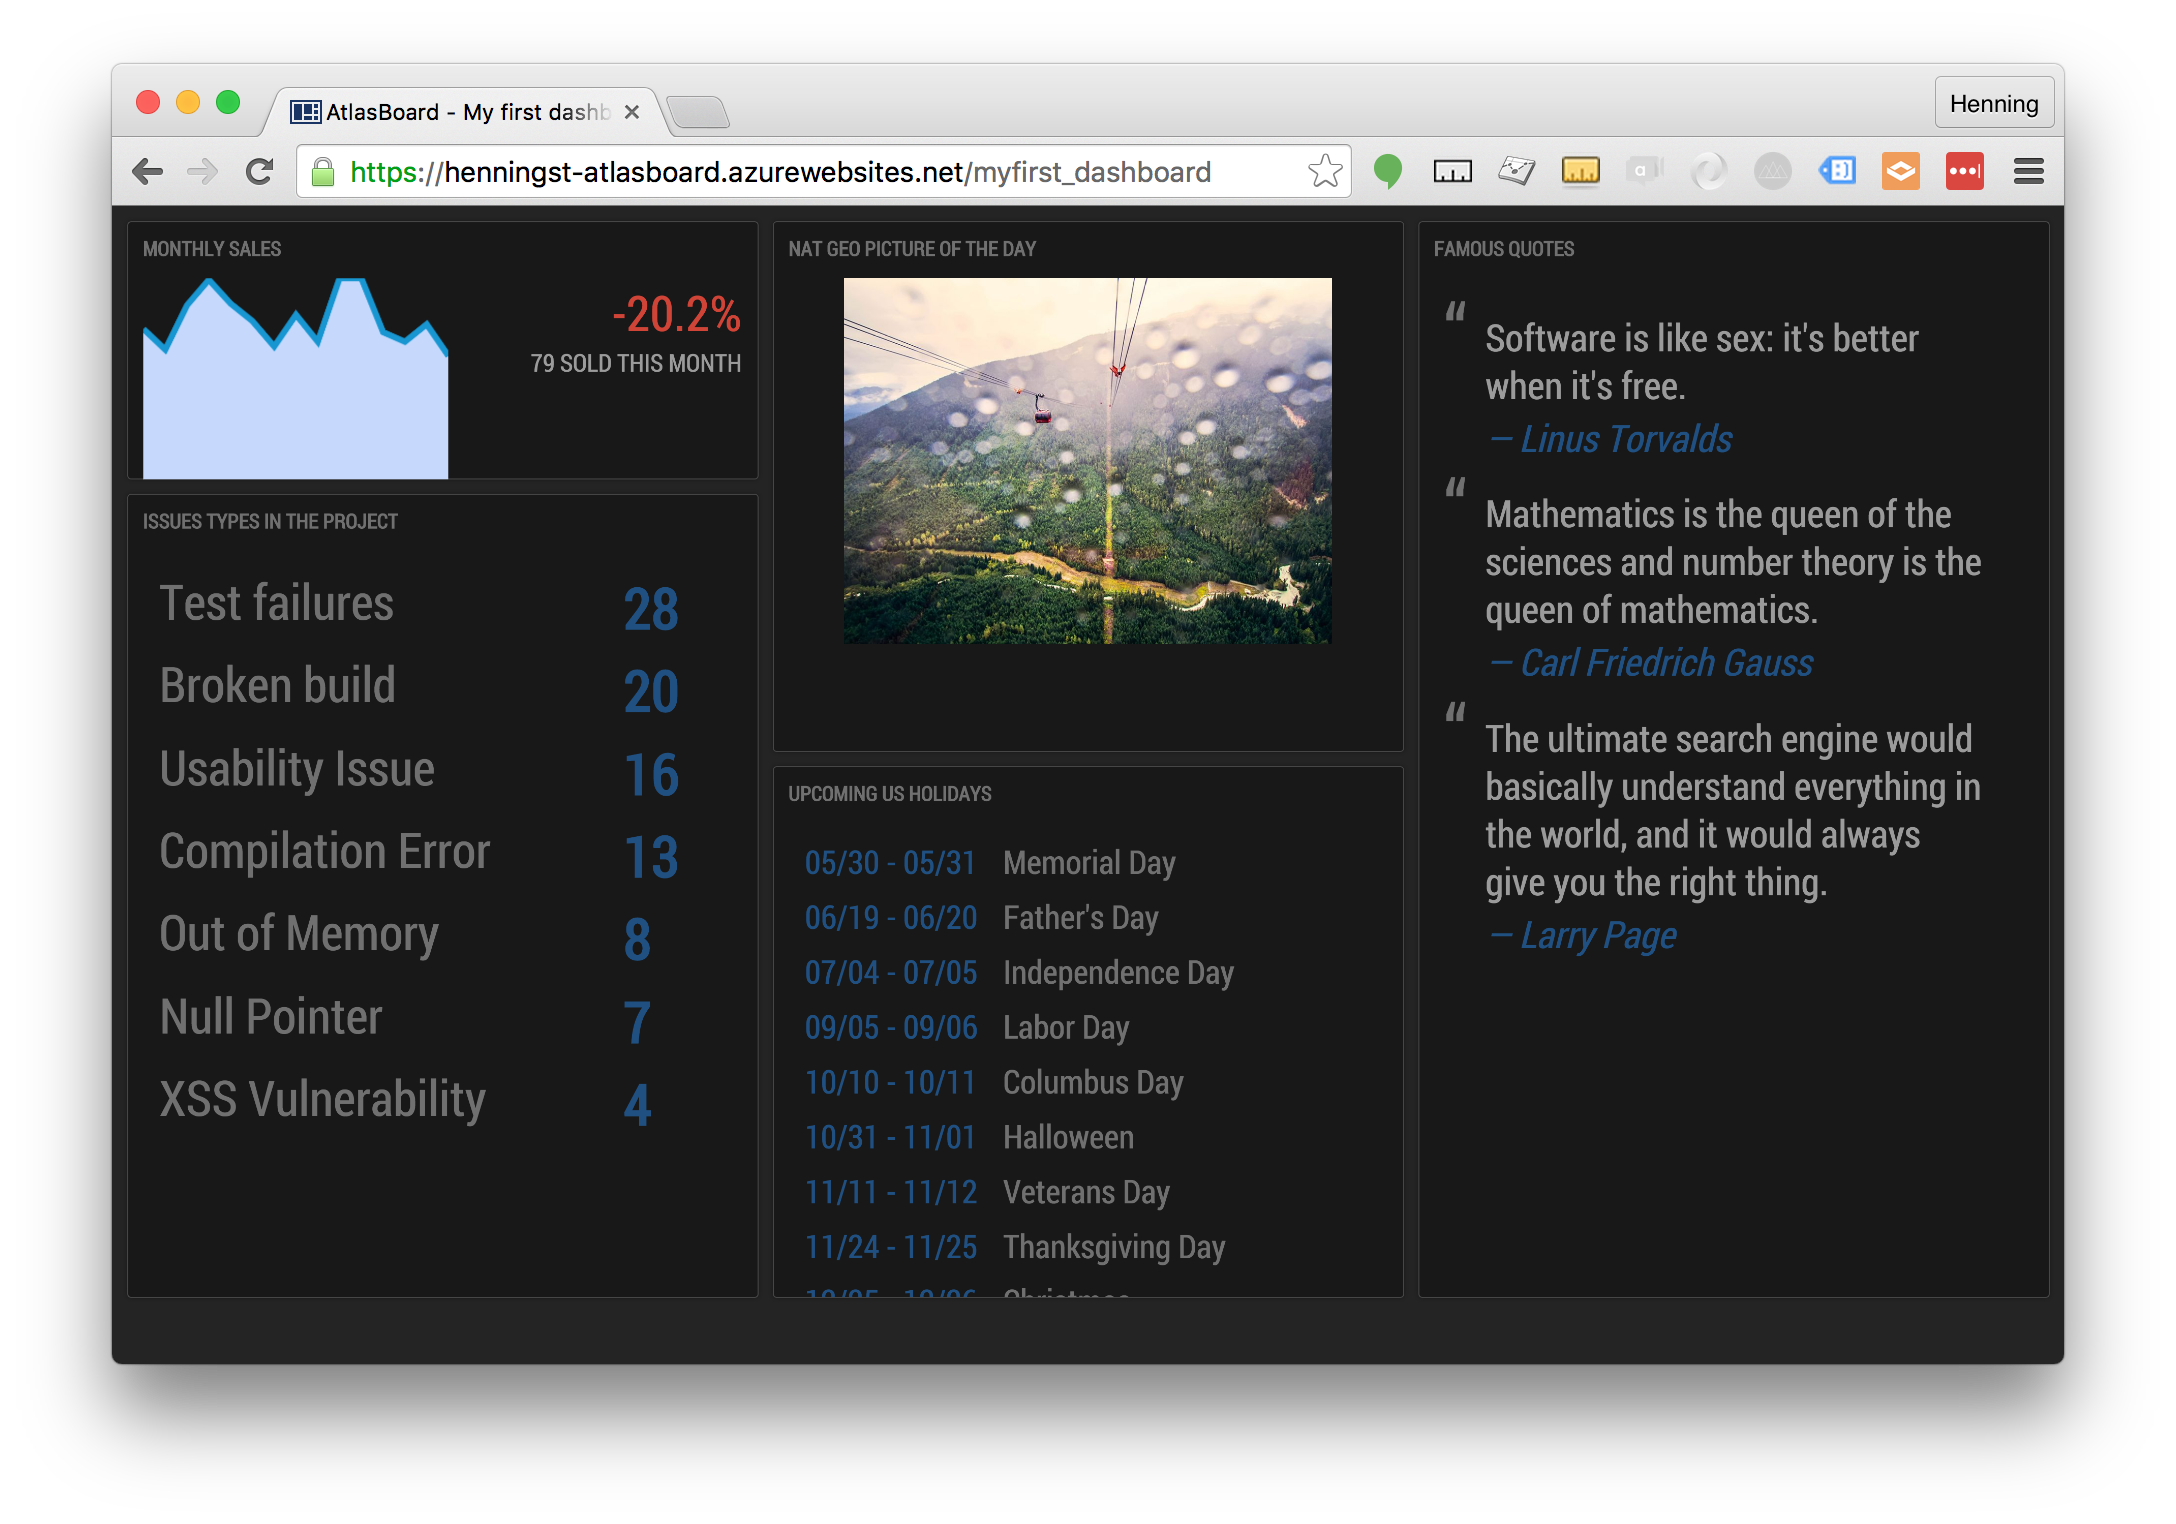
executeCommand(npmCommand, ["install", pathPackageJson], function(err, code){If you access the web app url, you should now see the demo dashboard up and running!
Thanks
Thanks @garyliu to for helping me get this up and running by answering my stackoverflow question
Troubleshooting
If you still run into problems, it might be useful to add the following lines to the iisnode.yml file in wwwroot where your webapp is installed.
loggingEnabled: true
logDirectory: iisnode
This will enable logging for iisnode and you´ll see log files starting to show up inside wwwroot/iisnode.